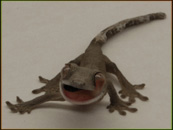


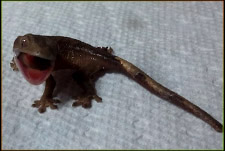
Crested & Gargoyle Gecko Breeding
The basics of breeding Rhacodactylus auriculatus & Correlophus ciliatus
Important note: This article was written in ~2010, and will soon be updated with up-to-date practices. ♥

Introduction
Breeding Conditions
Temperatures should be kept between 74-79F during breeding season, with night time drops as low as 69F. We increase our automated misting to 2-3 cycles daily, at about 1 minute/ea cycle to keep relative humidity around 70-85%. This will encourage breeding behavior, and will help limit the risk of eggs drying out if they aren't found right away. We usually keep a 1:1 or 1:2 ratio of male to female Geckos per enclosure. Breeding pairs are kept in 18X18X24 (or larger) vivariums. Using larger enclosures helps minimize the risks of Geckos losing tails during breeding. While it's nothing more than an aesthetic preference, we're very particular about making sure Geckos keep their tails for as long as possible. (Ideally forever!) If you are planning on breeding in groups, be sure to have a very large, very tall cage.
Introducing The Geckos
When a Gecko is first placed inside an enclosure housing it's future mate, try and put it in a place that's as far as possible from the other Gecko. That way, they can slowly approach each other when they are ready. During this time, do not reopen the enclosure or interfere with either animal. We usually introduce Geckos a few hours before the lights go out, when they are less active to give them the best chances of a "good introduction". Eventually they will approach each other and many will use body language, squeaks, and other noises to communicate during breeding season. The first few hours after the Geckos have been introduced can sometimes tell you a lot about how the interactions between them will go. Some individuals will mate shortly after introduction, but some may not mate for a day or two (or even longer!). If either Gecko seems overly-aggressive immediately after introduction, it's important to separate them to try again later. Overly aggressive behavior can result in injury, so it's usually better to be safe than sorry.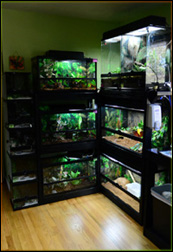
Pairing The Geckos
It is normal for both Crested & Gargoyle males to gently bite up and down the female's sides, neck, and tail before mating. It is also normal for them to vocalize during this time. Do not interfere unless either Gecko's wellbeing is in question. Mating can last anywhere from a few seconds to a few minutes. Depending on the individual pair's interaction, the Geckos can either be separated immediately after copulation (if there are clear signs of aggression), left for a limited duration (usually a few days to ensure a successful pairing), or even left in as permanent companions if both Geckos are non-aggressive and appear to "get along". It's always important to carefully monitor each pair's interaction over the first few days to ensure a good pairing if you decide to leave them together for any period of time. Measure the risks of negative interaction against each individual animal's disposition, since each Gecko can act completely differently than another. Typical signs of aggression include bite marks, scratches, and of course missing tails. Geckos that are well-paired long-term often sleep next to each other, eat together, and more.Egg Handling
There is different egg handling advice, depending on the enclosure type being used. Below, we've got suggested options broken down by the most commonly used enclosure setups.

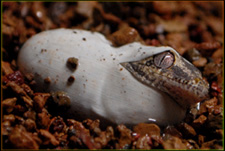
Eggs & Incubation
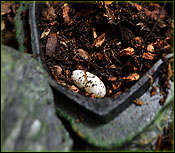
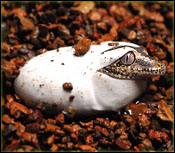
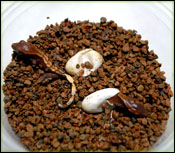
Most gravid females will drop 2 eggs about once per month. Eggs should look white to milky white in color, and should be a smooth oval shape. Yellow & misformed eggs are usually infertile, but you can also candle an egg to check for fertility. This is done by shining a bright light (we use an LED flashlight) through the egg and looking for a red "bullseye" usually formed by a developing embryo. Either way, it never hurts to incubate the egg(s) just in case. When the eggs are first discovered, we recommend using a sharpie marker to dot the side facing upward before they are moved. This helps to ensure the egg will remain oriented correctly throughout the incubation period, and maximize the egg's chance of hatching.
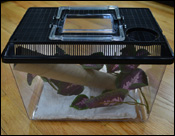
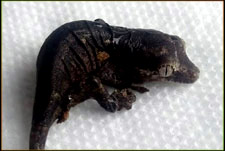
Housing Hatchlings
Newly hatched Geckos are sensitive and require more attention than their adult counterparts. Most keepers recommend keeping hatchlings in the incubator until they've had their first shed, which is critical. (Typically within 12-24 hours of hatching, provided there is enough humidity) Be sure the 1'st shed comes off completely before proceeding by providing plenty of humidity.