

View Cart


Your 1-Stop Vivarium Shop! Your 1-Stop Vivarium Shop!
Loading Loading

Loading

Loading Loading

Loading

Loading Loading

Loading

Loading Loading

Loading

Loading Loading

Loading

Click here to force load

Tap here to force load

Vivarium Showcase:

"A Quick Gargoyle Gecko Vivarium"

 
Cost:
Vivarium Cost Vivarium Cost Vivarium Cost Vivarium Cost Vivarium Cost
 
Difficulty:
Vivarium Difficulty Vivarium Difficulty Vivarium Difficulty Vivarium Difficulty Vivarium Difficulty
 
Time Investment:
Vivarium Time Investment Vivarium Time Investment Vivarium Time Investment Vivarium Time Investment Vivarium Time Investment
 
Gargoyle Gecko Vivarium
 
 
This vivarium was incredibly simple to build, which is one of the reasons why we decided to feature it in the Vivarium Showcase. Based on an Exo Terra 18x18x24 enclosure, it's an excellent example of a "beginner friendly build" since it's an absolute piece of cake in terms of difficulty. We wouldn't consider this one a show piece by any means, but it's got a few interesting features we felt were worth mentioning, and is a perfect example of an easy, budget-friendly live vivarium.
 
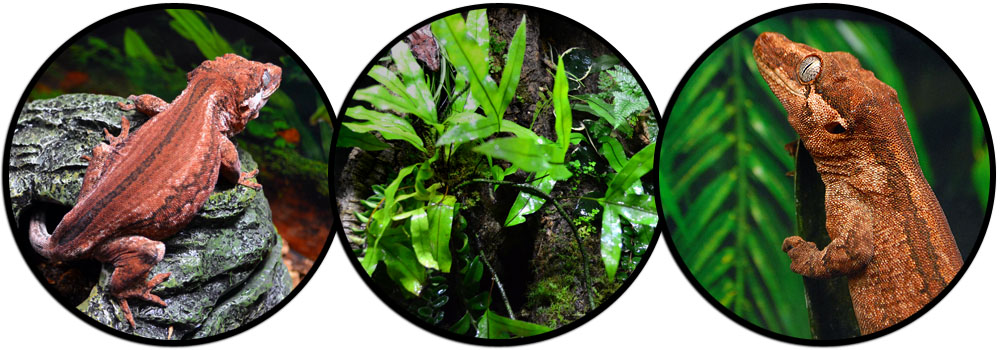
Live Vivarium Gargoyle Gecko Close Up
This enclosure was created as part of our Gargoyle Gecko Breeding Program which was ended back in 2014, but the enclosure remains on display in our offices. The vivarium was also built to help test an early version of our NEHERP Live Moss Slurry, and was also used as a later-stage test of our V2 Vivarium Substrate. We've had nearly a dozen Gargoyle Geckos hatch out directly inside this enclosure, and (knock on wood) have yet to find an egg that didn't make it through incubation.
 
Live Vivarium Gargoyle Gecko Close Up
The Gargoyle Gecko this vivarium was built for has been in our care since 2010, and is paired to the male at the top right of every page of our website.

(Note: The Gargoyle on our site's header is hidden on mobile devices! :-) )

This species is an ideal vivarium candidate, and despite their size, don't do much to disturb well acclimated plants which live within the environment. Consuela (the name of this particular Gecko) is a sweetheart & a real favorite to the team at NEHERP, so we wanted to build her a very comfortable home to call her own. In this vivarium showcase, we'll describe just about everything we did to put her enclosure together in detail.
Gargoyle Gecko Vivarium
 

The Custom Background

How we built this enclosure's custom background
☆ The below info follows the basics outlined in our Gecko-Safe Custom Background DIY Article ☆
 
Gargoyle Geckos are on the larger side of the vivarium inhabitant spectrum, and they posses claws which can damage a traditional Custom Foam Based Background. To ensure the enclosure's background can last long term, we used our DIY Gecko-Safe Custom Background method, and were finished in an extremely short amount of time. An experienced hobbyist with the right tools & supplies can put something like this background together in well under an hour. (Not including a little curing time)
 
 
Recycling Bin Vivarium

With The Background Still Outside The Enclosure...
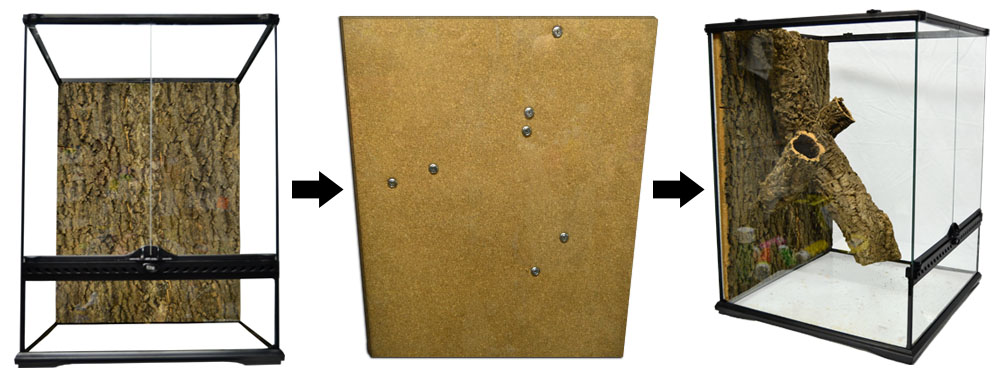
We began with a basic Zoo Med Cork Tile Background, a pair of Modular Cork Planters, and a large Cork Round. As mentioned in Vivarium Construction 101, cork is fairly soft in comparison to most other types of vivarium wood, and is very easy (and forgiving!) to work with. Once we decided on a basic layout for the cork pieces, we applied a thin (1/8in) layer of ASI Aquarium Silicone to the surfaces where the pieces would meet. The parts were carefully pushed together, and Stainless Steel hardware was utilized to even more tightly join the wood decor & Cork Tile Background together. To do that, we simply inserted the screws through the background and screwed them into into the decor itself. (Shown in the center of the image) The screwed-tight stainless hardware pulled the wood tightly against the background tile, with the silicone sandwiched between them. Excess silicone which was squeezed out around the decor was coated with a layer of our NEHERP Custom Background Texture Mix, which helped to visually blend the pieces together while hiding the exposed silicone. We used an electric drill to add pilot holes through the background & screw the pieces together, but it can definitely be accomplished without power tools with a little more effort.
 
Recycling Bin Vivarium
 
Installing The Background
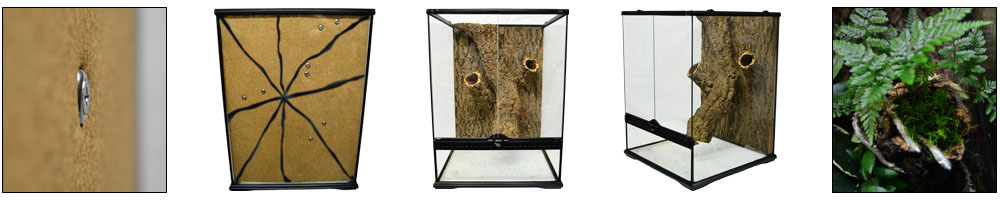
With the background panel finished, it was time to install it onto the enclosure itself. Before proceeding, we made sure that none of the stainless steel hardware bits stuck out past the cork tile background. (Closeup of this shown in the photo) If a piece of hardware sticks out past the outside of the cork background, it will make it a little more difficult to adhere it to the glass. With all of the stainless screws flush with the background, we added a "union jack" style pattern of silicone on the back of the cork tile, and inserted the background into the terrarium diagonally through the top. We prefer this type of silicone pattern since it allows a little air into each area, to help accelerate the curing process. The enclosure was then tilted onto it's back panel with weight (a bag of sand, in this case) added on top of the background, to ensure the the tile would adhere well to the glass. By the next morning, we tilted the enclosure back to it's correct orientation, and were ready to plant the enclosure.
 
Please note: If you have any questions about the above process, please check out our more detailed step-by-step Gecko-Safe Custom Background DIY Article.
Custom Vivarium Background For Gecko
Left: Test fitting the Exo Terra Enclosure with a Zoo Med Cork Tile Background.
Center: View of Cork Tile Background after the wood decor & silicone had been added to the front.
Right: Dry test fitting the customized background before adding silicone.
 
Recycling Bin Vivarium
Far Left: Closeup of the way our Stainless Steel Hardware should appear once installed. (Flush with the cork tile!)
Center-Left: Silicone added to the background tile & installed on the enclosure.
Center: Front view of the enclosure with the new customized cork tile background installed.
Center-Right: Front-right view of the enclosure with the new customized cork tile background installed.
Right: A view of the upper right modular cork planter, planted with NEHERP Moss & a Rabbit's Foot Fern.
 

Substrate

What we used for the substrate layers
☆ Check out Vivarium Construction 101's substrate paragraphs for a ton of detailed substrate info. ☆
 
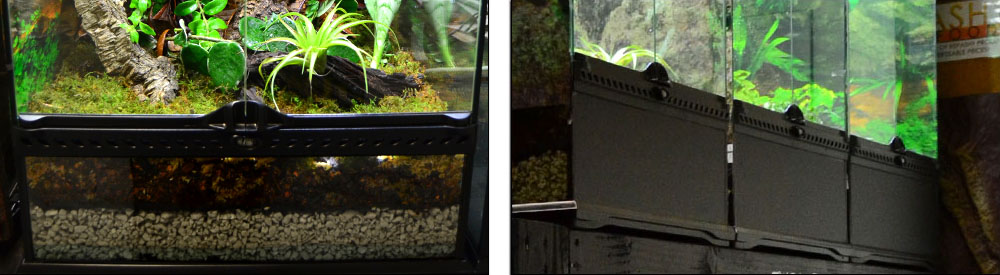
Gargoyle Geckos are from New Caledonia, a small group of tropical islands located in the southwest Pacific. According to weather records, relative humidity remains in the mid-to-high 70% range year round. While Gargoyle Geckos are an arboreal species, in our experience, they do visit the ground from time to time. Especially when it comes time to lay eggs! Like most of our live vivariums, we used a NEHERP Substrate Base Kit, and in this case, we elected to utilize our NEHERP V2 Vivarium Substrate because it was designed with these specific humidity/moisture requirements in mind. The lack of Tree Fern Fiber in the substrate mix helps to minimize the risks of the animal injuring an eye while she digs to bury eggs, while the calcined clay ingredient helps to maintain aeration within the soil & a healthy population of microfauna.
 
Recycling Bin Vivarium

Half of what makes a live vivarium so awesome is it's ability to clean up after the inhabitant's waste. We seeded the substrate layer with Isopods & Springtails to ensure there would be enough of a "custodial staff" to keep things clean once the Gecko would be introduced. With plenty of live oak leaf litter tucked into the darker areas beneath the cork features, we ensured the microfauna populations would be able to establish themselves thoroughly within the initial 4-6 week acclimation period. As with all vivarium builds, this acclimation period is absolutely critical, and should take place before introducing the inhabitant species.
 
For tons more information relating to both substrate choice & live microfauna, check out Vivarium Construction 101 & Vivarium Construction 102.
 

Lighting

How this vivarium is illuminated
☆ Check out Vivarium Lighting 101 for a ton of great vivarium lighting advice & information. ☆
 
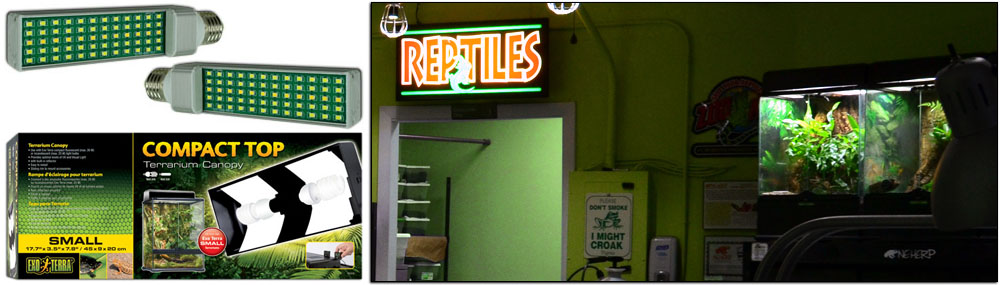
The 18x18x24 size enclosure is one of the most popular out there, and we're glad to offer a few options to illuminate it. This wasn't a high budget project, but we wanted to make sure all of the plants (including the light-sensitive Moss Slurry) would thrive within the enclosure. For that reason, we elected for the basic NEHERP Lighting Kit with LEDs. This is the brightest solution for the money that we recommend, and has been a proven performer since we introduced the kits back in 2013.
 
Gecko Vivarium Lighting

Before we install LEDs in a Compact Top, we always remove the aluminum reflectors inside the fixture help keep temperatures lower while extending the life of the LEDs. Like all of our vivaria, it's timed for 12 hours on, 12 hours off, to encourage a healthy circadian rhythm for all the living things inside.
 
For a whole lot more information relating to illuminating a live vivarium, visit Vivarium Lighting 101.
Gecko Vivarium Substrate
 

Plants

Flora selection can make or break a vivarium
☆ Visit Vivarium Construction 101's plant paragraphs for advice on how & where to mount specific plants. ☆
 
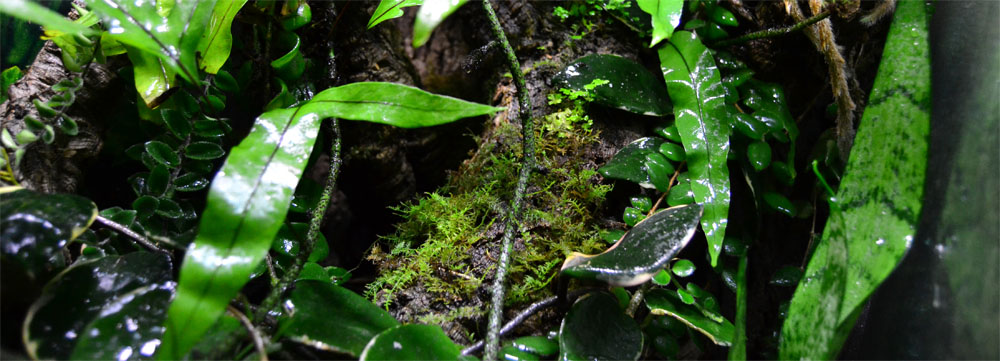
Using appropriate plants is especially important when housing a larger arboreal species like this one, since they can do a considerable amount of damage to sensitive plants.
 
Gecko Vivarium Plants
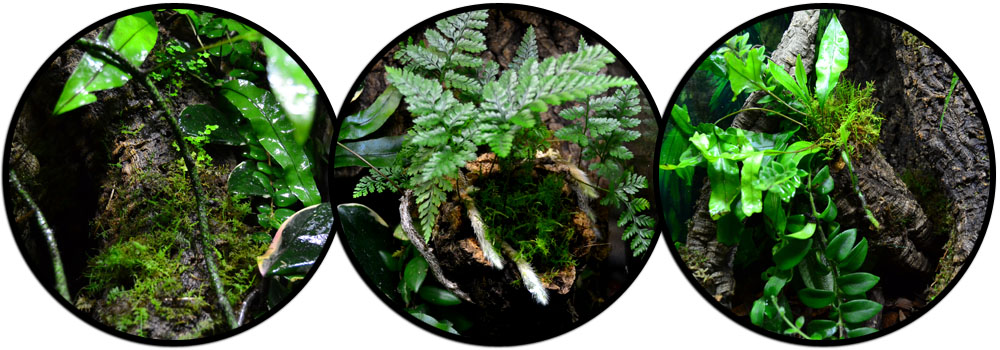
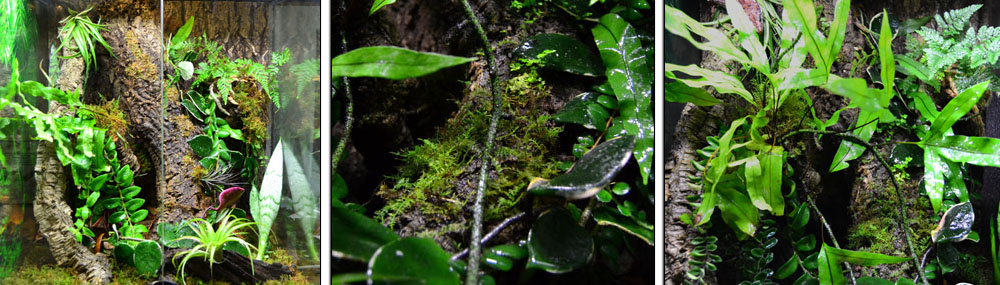
For this build's vining/trailing plants, we used Aeschynanthus sp, Columnea sp, and Hoya carnosa. Microsorum pustulatum is the primary fern species, while Davallia fejeensis (Rabbit's Foot Fern) is planted in the top right Cork Planter, with it's rhizomes growing outward & downward. A single Sansevieria plant was placed on the right hand side, since it's are one of very few compact, easy to trim, and easy to grow plants which can support even a large Gecko's weight. The large Tillandsia plant in the lower front is a T. brachycaulos, one of the highest-humidity tolerant air plants we offer. Lastly, NEHERP Moss & Moss Slurry were used all over the place to tie everything together.
 
Gecko Vivarium Plants
Freshly Planted
4 Months of Acclimation
In need of a trim!

While these plants may not have all the dramatic effect of some plants used with smaller inhabitant species (like Dart Frogs), the ability for each of these species to stand up to the long-term abuse of a Gargoyle Gecko makes them appropriate & ideal choices. All of the above plant species are often included in our heavy duty plant kits, if a Gargoyle Gecko is selected during checkout.
 
Selaginella uncinata Rainbow
Freshly Planted
4 Months of Acclimation
In need of a trim!
 

So that's how we did it!

We hope you enjoyed this vivarium's showcase!

 
Gecko Vivarium Plants
This enclosure is one of the simplest builds featured in our Vivarium Showcase, and is an awesome starting point for a beginner in the hobby. It's not by any means one of our most beautiful builds, but as a utilitarian vivarium focusing on function over form, it's proven it's worth. Another thing which makes this one unique is it's ability to support long-term development of Gargoyle Gecko eggs within the environment, thanks to a healthy population of microfauna, NEHERP V2 Vivarium Substrate, and temperatures which consistently remain in the 75-78F range. Please check out our Vivarium Building Articles for a ton of great info, and don't hesitate to contact us if something isn't answered on the site. Thanks for reading & good luck with your vivarium build!
 
Important note for anyone looking to incubate Gecko eggs within a vivarium:
First off, it's definitely a cool feature for a vivarium to have, but it isn't really as low-maintenance as it seems! Our staff checks our vivariums 1-2X daily for hatchlings, and we remove them as soon as they are found. Because the mother Gecko is housed within the vivarium, it's important to remove the babies ASAP to prevent aggression between the mother & hatchling. We do not recommend this practice if the father Gecko is housed within the vivarium, or if the vivarium will not be closely monitored.
Gecko Vivarium Plants
 

The Parts List

Everything we used to build the above live vivarium

 
Lighting
• 18x18x24 Vivarium Lighting Kit
The above kit includes the following:
• 2qty 13W LEDs
• 1qty Exo Terra Compact Top 18in
 
 
If one of the links above doesn't take you to the corresponding product, it's probably sold out or discontinued! Instead, the link will auto-direct to the top of that product's category page, where you might find something similar. :-)


That's the end of this particular vivarium's feature...

But there's plenty more where that came from!


Something went wrong...

Your browser is blocking active scripts!

This part of our website requires jQuery script to display properly.
Please turn off script blockers and/or allow scripts in your browser settings to continue.
Need help? Google results for "how to allow scripts" by browser:
Chrome | Firefox | MS Edge* | MS Internet Explorer* | Opera | Safari
Email support@neherpetoculture.com for help!
* Our website is best viewed in modern Chrome, Firefox, or Safari browsers. (Not IE / Edge!)
If you suspect an adblocker is blocking scripts, please whitelist us. Our site has no ads to block.